|
|
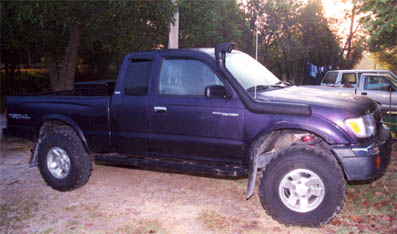
Comments in red are mine, most everything else is right off the install instructions. If you have any questions please email me. sloth@r65.org Click on the pictures to get a bigger image. I am still going to have to take it off one more time to get the fender repainted from a prior oops and I also cut a little to big of a hole and have that fixed.
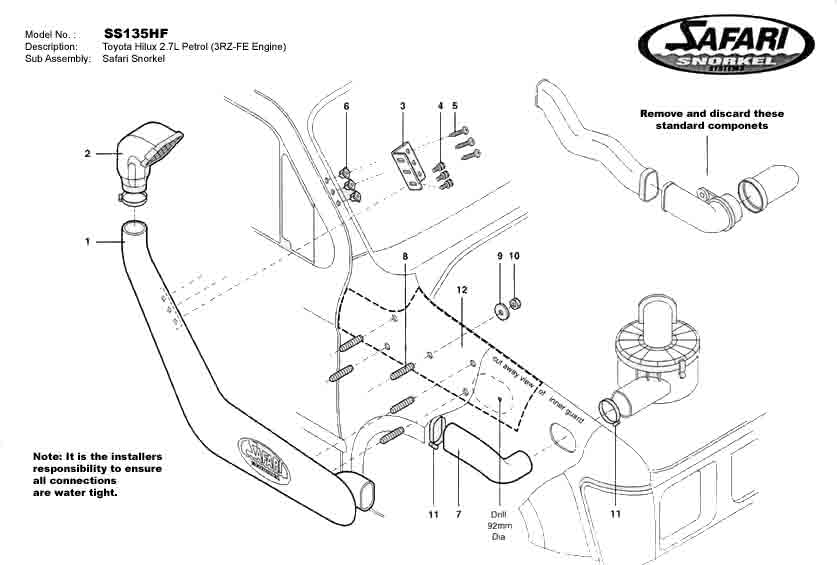
| TOYOT A HILUX & SRS HILUX | 2.7L PETROL (3RZ-FE ENGINE |
| Fitment to: | Right Hand Side |
| Fitting Time: | Approximately 120 Minutes (yeah right) |
| Special Tools: |
92mm
Holesaw |
|
Item |
Description |
Qty |
Part
No. |
|
1 |
BODY
-SNORKEL |
1 |
315-133-500
|
|
2 |
3
112" AIR RAM ASSEMBL y |
1 |
000-135-200 |
|
3 |
BRACKET
-UPPER MOUNTING |
1 |
315-032-500 |
|
4 |
BOL
T -HEX 6mm x 1.0mm x 14mm |
3 |
000-002-100 |
|
5 |
SCREW
-SIT 4.2mm x 13mm |
3 |
000-951 |
|
6 |
BODY
CLIP -PLASTIC |
3 |
000-960 |
|
7 |
HOSE-AIR
ENTRY |
1 |
315-024-500 |
|
8 |
STUD
-SIS 8mm x 1.25mm x 25mm OIL |
5 |
000-110 |
|
9 |
WASHER-80DY
8mm x 30mm |
5 |
000-311 |
|
10 |
NUT
-NYLOC 8mm x 1.25mm |
5 |
000-205 |
|
11 |
Clamp-Hose
70/90mm |
2 |
000-908 |
|
12 |
Template |
1 |
315-017-500 |
|
13 |
Hose
Clamp-Size 56 |
1 |
000-914 |
Instructions
| 1. |
|
2. Tape the template to
the upper rear corner of the right hand guard. Using a felt tip pen, mark all
hole positions on the guard (including cut away section) remove template.
3. Drill a pilot hole
for each hole position. Using the step drill, drill the 5 snorkel mounting hole
positions to 16mm, using the 92mm holesaw, drill the main hole, using the air
hacksaw, enlarge the main hole as per the template cut away section, de-burr and
paint all holes. ![]()
![]()
4. Screw the 5 mounting
studs into the snorkel body inserts, carefully position the snorkel body onto
the guard and secure with 2 or 3 nuts and washers. With the snorkel body
correctly positioned on the guard, fasten the upper mounting bracket to the
snorkel, mark the 3 hole positions on the "A" pillar (the bracket
should run parallel with the windscreen rubber), holding the snorkel in position
on the "A" pillar carefully open the front door and check the snorkel
body and mounting bracket has adequate clearance to the door frame
5. Remove the snorkel
body and drill the 3 marked hole positions in "A" pillar to 8mm.
De-burr and paint all holes. Insert plastic body clips into "A"
pillar. 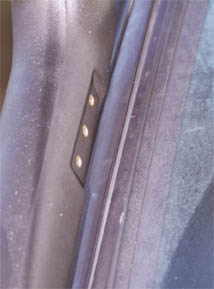

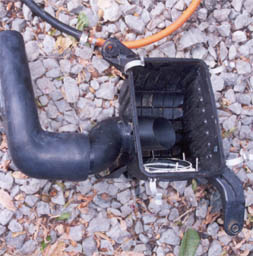
6. Re-install air
cleaner assembly to vehicle and connect air entry hose (item no.7) to air
cleaner housing inlet, fasten hose using 1 x 70/g0mm hose clamp. The
remaining hose clamp will need to be shaped and placed into position at the
other end of the hose.
![]()
![]()
7 Install snorkel body
to guard, guiding the snorkel snout into the air entry hose (a small amount of
lubricant may be required) with the Snorkel body correctly positioned fasten
using necessary hardware. 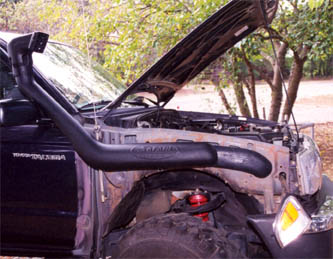
8. Fasten upper
mounting bracket to the snorkel body and secure to "A" pillar, install
air ram assembly and fasten.